

Rear Hard Top Removal
1. Remove both front panels. Refer to “Front Panel(s) Removal” in this section.
2. Open both doors.
3. Remove the two Torx head screws that secure the hard top at the B-pillar (near the top of the door) using a #40 Torx head driver (Four–Door Only).
4. Remove the six Torx head screws that secure the hard top to the vehicle (along the interior bodyside) using a #40 Torx head driver.
5. Open the swing gate all the way to ensure clearance of the rear window glass. Lift the rear window glass.
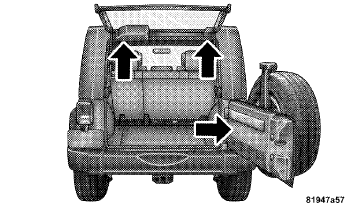
6. Locate the wire harness on the left rear inside corner of the vehicle.
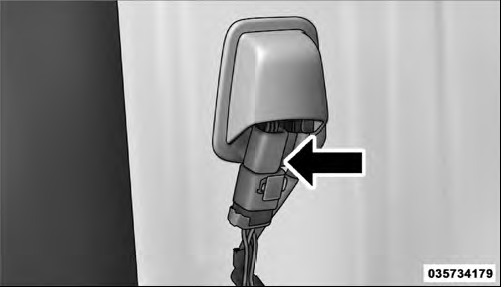
Wire Harness Connector
7. Release the red locking tab by pulling outward.

Red Locking Tab
8. To remove the wiring harness press the tab and pull downward to disconnect.
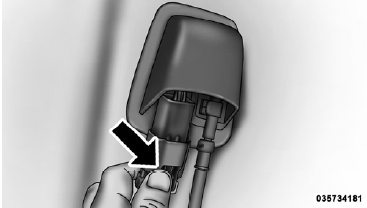
Press Tab To Disconnect
9. To remove the washer hose, pinch the grips on hose connector and pull downward.
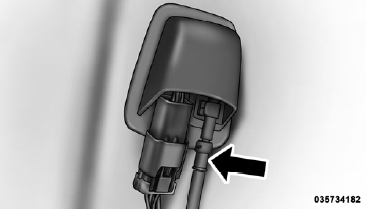
Pinch Grip On Hose
10. Close the swing gate.
11. Remove the hard top from the vehicle. Place the hard top on a soft surface to prevent damage.
CAUTION!
The removal of the Freedom Top requires four adults located on each corner. Failure
to follow this caution could damage the Freedom Top.
See also:
Disposal Of Used Engine Coolant
Used ethylene glycol-based engine coolant (antifreeze) is
a regulated substance requiring proper disposal. Check
with your local authorities to determine the disposal
rules for your community. T ...
Tilt/Telescoping Steering Column
This feature allows you to tilt the steering column
upward or downward. It also allows you to lengthen or
shorten the steering column. The tilt/telescoping lever is
located below the steering wh ...
Brake Assist System (BAS)
The BAS is designed to optimize the vehicle’s braking
capability during emergency braking maneuvers. The
system detects an emergency braking situation by sensing
the rate and amount of brake a ...