

Fuel Filler Cap (Gas Cap)
The gas cap is located behind the fuel filler door, on the driver’s side of the vehicle. If the gas cap is lost or damaged, be sure the replacement cap has been designed for use with this vehicle.
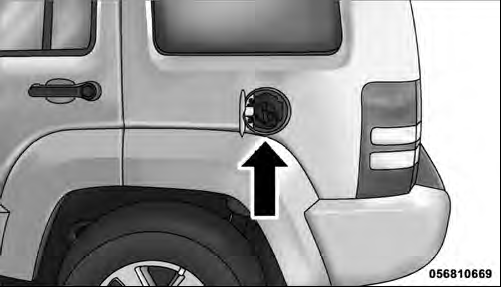
Fuel Filler Cap
CAUTION!
• Damage to the fuel system or emission control
system could result from using an improper fuel
cap (gas cap). A poorly fitting cap could let impurities
into the fuel system. Also, a poorly fitting
aftermarket cap can cause the “Malfunction Indicator
Light (MIL)” to illuminate, due to fuel vapors
escaping from the system.
• A poorly fitting gas cap may cause the MIL to turn on.
• To avoid fuel spillage and overfilling, do not “top off” the fuel tank after filling.
WARNING!
• Never have any smoking materials lit in or near
the vehicle when the gas cap is removed or the
tank is being filled.
• Never add fuel when the engine is running. This is in violation of most state and federal fire regulations and may cause the MIL to turn on.
• A fire may result if gasoline is pumped into a portable container that is inside of a vehicle. You could be burned. Always place gas containers on the ground while filling.
NOTE:
• When the fuel nozzle “clicks” or shuts off, the fuel
tank is full.
• Tighten the gas cap about one quarter turn until you hear one click. This is an indication that the cap is properly tightened.
• If the gas cap is not tightened properly, the MIL will come on. Be sure the gas cap is tightened every time the vehicle is refueled.
See also:
Fuel Requirements
All engines are designed to meet all emissions
regulations and provide excellent
fuel economy and performance when using
high quality unleaded “regular” gasoline
having an octane rating ...
Wind Buffeting
Wind buffeting can be described as the perception of pressure on the ears or
a helicopter-type sound in the ears. Your vehicle may exhibit wind buffeting with
the windows down in certain open or p ...
Pinch Protect Override
If a known obstruction (ice, debris, etc.) prevents closing
the sunroof, press the switch forward and hold for two
seconds after the reversal occurs. This allows the sunroof
to move toward the c ...